Designing a Versatile Planet Shader for Crying Suns
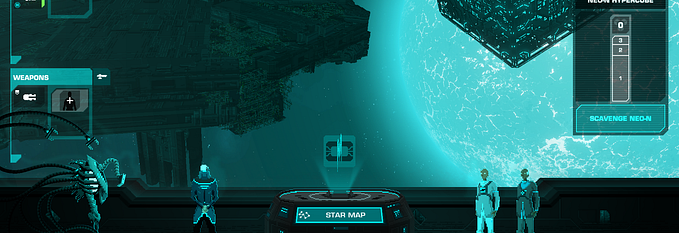
Crying Suns is a story-driven tactical rogue-lite game set in a dying galaxy. You play as a space fleet commander, encountering some friends and many foes as well as exploring planets. The game is made with Unity in Montpellier, France by our team of 15 and is due for release on Steam during H2 2019 after a successful Kickstarter campaign.
As one of the lead developers, I was given the task to build a shader for planets and stars. We are a small team, so the shader was meant to be easily maintainable and extensible, as well as explicit and versatile enough for the artists to work on their own most of the time.
Stay Consistent with the Artistic Vision

Crying Suns is a video game, more specifically a heavily stylized pixel art game. We do not tend to be physically accurate, nor we think our players would find it fun it the context of our narrative gameplay.
As long as the player feels the planet lives in space, we’re good. With that in mind, I was able to take many shortcuts, but some properties should remain : atmosphere including haze/halo on the outer ring, clouds with shadows on the ground, cities lit in the shadows and so on, all of that perpetually animated to simulate planet rotation.
A number of constraints existed though. First, the planet will be rendered in 3D, but the pixel art style of the game must remain present. Also, during exploration phases, the player is always facing the main light source, the star of the planetary system. So planets are always represented against the light.
First challenge — The Sphere Mesh
Unity provides primitive geometry for simple objects like a cube, a plane, or a sphere. However, those objects are mostly intended for prototyping games and they’re not customizable, implying that we can’t increase or decrease the amount of details in the underlying mesh.
And the fact is that the built-in sphere is not very round. This is OK for prototypes or small objects, but it is not suitable for a big stellar object like a planet or a star. So we made our own customizable sphere generator and achieved the expected quality.

From the Ground Up
Now we have the base geometry correctly set up, it is time to bring some shader into the party.
What do we need to build a planet?
- A ground,
- Ground / city lights,
- Clouds and their drop shadows onto the ground,
- An atmosphere
Each of these elements can act like a “layer” in the final composition. The artists should be able to disable some of them (like the city lights for an uninhabited planet or the clouds) and animation should be set up on a layer basis (clouds are revolving faster than the ground as they have a positive relative speed with it).
Based on those constraints, we ended up with a multi-pass shader. All passes can be done with the same geometry (the base sphere), but we need to make the sphere bigger for certain passes (clouds and atmosphere basically). The vertex shader can be customized for those passes specifically.
Also, as we only want to use a single material for easy asset management, we decided to render the whole planet as a transparent object even if most of it is opaque in practice. Unity does not allow to select a render queue per shader pass.
The passes list goes as follow:
- Outer Atmosphere
We grow the sphere to make the atmosphere bigger than the actual “rock”. We basically dissolve the sphere bounds as we approach it. As this overgrown sphere is the biggest object of all passes, we render it first, making it visually “behind” other elements. - Ground
A visually opaque surface consisting of a color-tinted texture. - Cloud Shadows
Based on the cloud texture used in the corresponding pass, we apply a simple offset and a dark color to emulate cloud shadows. - City / Ground Lights
Ground and city lights are visible on the face of the planet that lies in the shadows. - Clouds
We apply the cloud texture as is, without color tint, on a grown sphere to make the clouds float above the surface. - Inner Atmosphere
In complement with the outer atmosphere, we apply a sort of atmospheric haze on the surface of the planet, to fill in the gap with the outer atmosphere.

Becoming a Star
Derivating a star shader from the planet’s one is not a very difficult task. You just have to consider the physical differences between a star and a planet to get to the point.
First, a star has no cloud and obviously no cloud shadow. Second, there is no city on the ground. Finally, the whole surface emits light, so you don’t have to consider external light sources.
Most of the work is done by the artists and the ground / surface textures they have to create.

Conclusion
Building a whole galaxy and providing variety for a number of planetary systems is not a simple task for such a small team as ours. This modular shader approach allowed us to create an interesting starter pack of planets while keeping the door open for many more.
Thanks to a very consistent artistic vision from the very beginning of the project, the initial shader has only suffered a few marginal evolutions, revealing itself as a very cost-effective solution.
Update!
Since the original version of this post, the game has been released and is now available for Windows and macOS on Steam, GOG and the Epic Games Store (along with a free demo), as well as on mobile on android and iOS.


